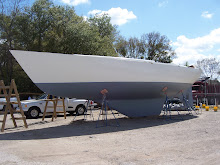
Saturday I finally finished removing most of the deck hardware.
After I got the deck looking a lot better, it was back to working on the hull. Time to begin repairing the Basket Ball hole. The small hole repair was my main focus and a confidence builder to tackle the V-Hold repair later.
Outside view of Basket Ball hole
Inside View of Basket Ball hole
I cut a piece of plastic material measured from the inside to use on the outside.
I then used put the plastic in between the hull and the plywood. I used a 4'x4' sheet of 1/4' plywood because it bends easy and could bend to the shape of the hull naturally. I then used the handmade heavy latter I made and laid it against the sheet of plywood on the hull. For added strength I then applied some screws to secure it tightly to the hull which I could patch the screw holes later easily. Once this was done I went on the inside and apply the fiberglass cloth in layers over the repaired hole area which worked perfectly.
Here is what it first look like from the inside after the outside plywood was set in place ready for the inside repair to begin.
Using the other half sheet of plywood as a table inside and covering it with plastic so I could wet out the fiberglass cloth, this proved to be easy but I had to work quickly because the cabin temperature was very warm. Also I didn't have a lot of time before the resin would setup so I had to work extra fast. I cut 7 layers of fiberglass, each one smaller then the other. This way the thickness would be even over the entire patched area.
Here was the finished product from the inside. Please keep in mind this was only the initial layers. After I grind the interior hull and this repaired area, I would then apply the rest of the layers needed followed by a few fiberglass layers 10'x4' over the entire area to add even more strength to the area.
Now I just let it dry for 24 hours and would come back tomorrow to unveil if this process actually worked. I came back Monday evening to remove the exterior plywood and got a first look at the results. It worked!
This was the only picture of this hole after it was repaired and we put the first coat of filler over it. The exterior shape was perfect which made fairing the area very easy.
One thing I did learn with repairing this hole was I was not going to work alone on the larger V-Hole. I need a helper!


No comments:
Post a Comment